4. MODELING & RIGGING
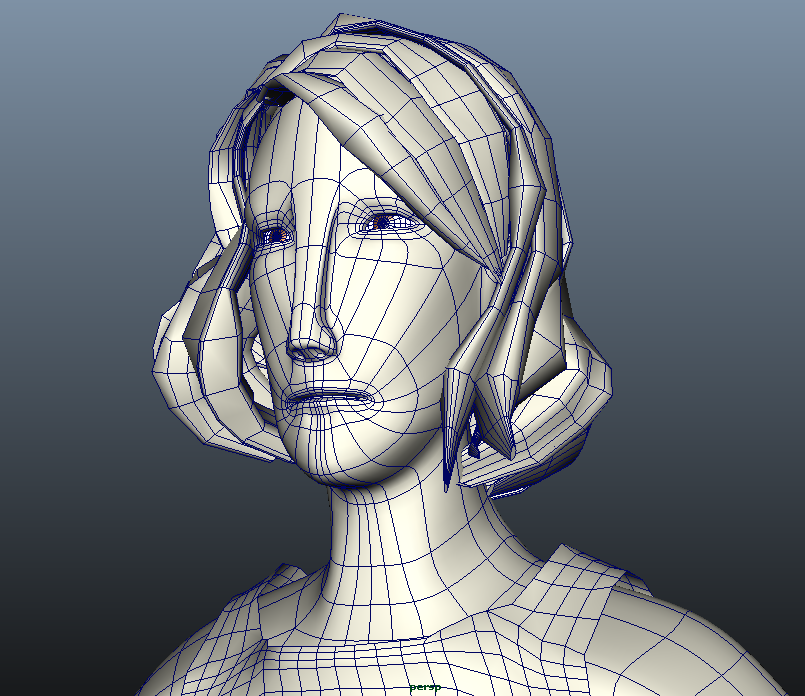
Being brand new to 3D graphics, modeling was both exciting and intimidating. What if I started it all wrong and by the end I didn't have time to fix it? What if I made it so badly that the animation looked terrible? What if I just failed everything?! I thought that in some ways, modeling would be a lot like sculpting in real life: you take a big block and hack away until it becomes something. And in a way it is like that, but it's also like solving a puzzle at the same time; you try to keep all your polygons four-sided, and you also have to keep in mind how the model will move. For example, you need to think about how the movement of the eyes will also affect the movement of the brow and cheeks, which will affect the movement of the mouth and nostrils....when something has to move, things get a lot more complicated.In retrospect, it was probably that paranoia that made me learn alot and appreciate modeling. I did my best to keep my design as simple as possible to keep render times down and make the animation process easier, while also maintaining a distinct visual style.
Probably the most challenging thing to model, though, was the hair. I went through countless iterations trying to come up with a way to make it so that I could animate it convincingly, without it becoming a horrendous mass of interpenetrating polygons. I couldn't use a static shape for the hair because wind would be playing such a major part - having the cloak blowing around without the hair also moving would look odd. My solution was to make several thick, distinct "strands" to cover the head, which I could form volume from while keeping the poly count fairly low.


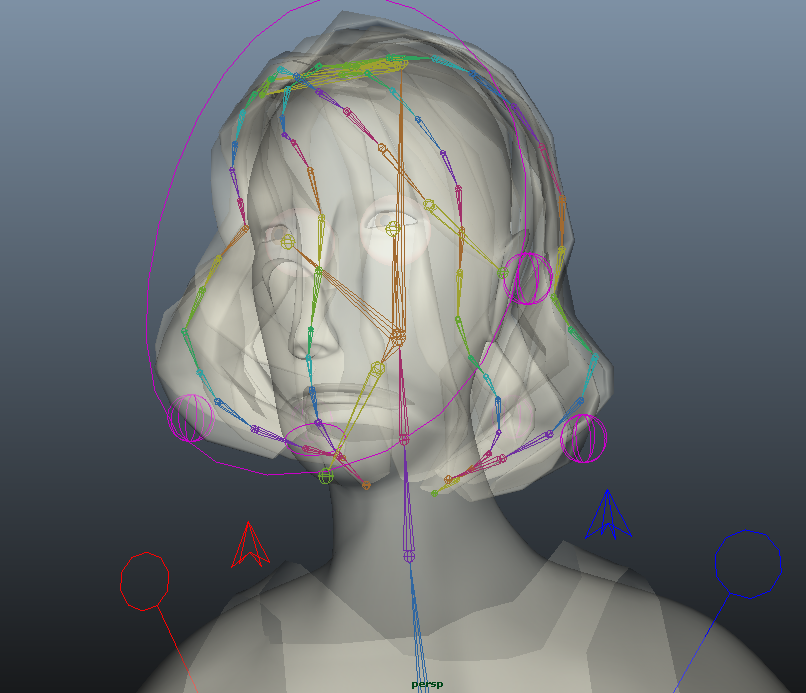
And then: rigging. If you mention "rigging" at any student animation schmooze of ten people, you'll probably get nine groans and one excited smile. The fact is, rigging is a hard-technical process involving math you wished you remembered from high school, and any little number that's off can literally make your model explode. You're essentially making a skeleton with fully rotatable joints, but - just like with modeling - you have to think about how it will have to move, like how lowering the pelvis will cause the knees to bend and the ankles to rotate. It's the sort of thing that would appeal to people like clock makers or automaton builders, and also - weirdly - me. It's probably the same vaguely masochistic side of myself that also enjoyed scouring every inch of my model for non-four-sided polygons. At the same time, I did have to essentially re-rig the whole thing three times. But in the end, I finally had a fully functioning rig complete with a stretchy spine, a scalable god node, IK and FK switches for the arms and legs, autonomous clavicle joints, individual finger controls, eye controls, and a facial expression system combining blendshape controls and soft-selection vertex clusters for nuanced facial expressions. On top of that, I also rigged the hair - each "strand" having its own chain of joints controlled by an IK spline.

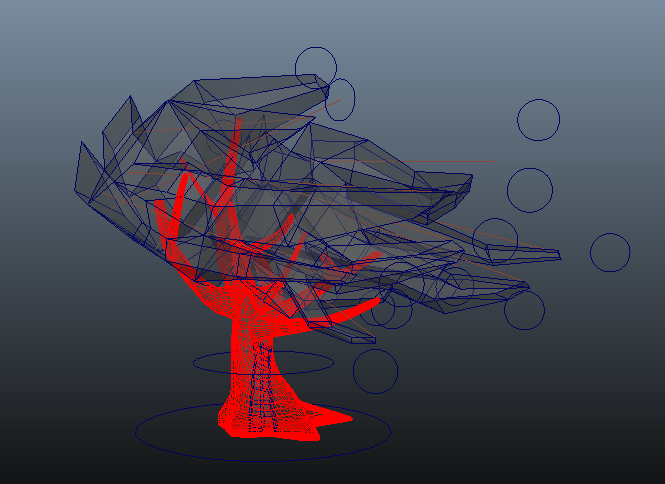
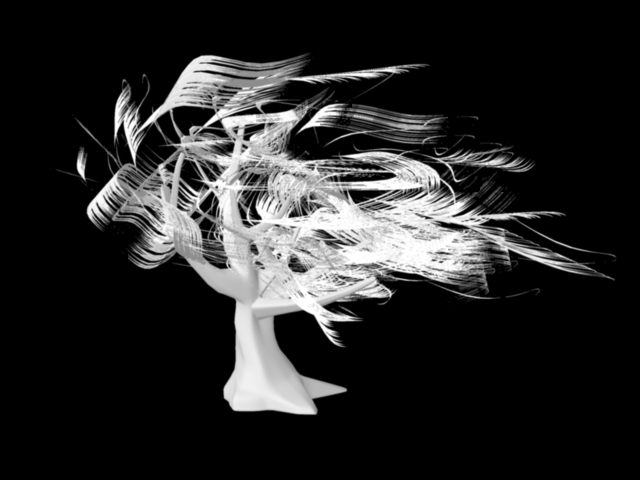
The other "main character" I had to worry about, of course, was the tree. For most of the time it appears, it's actually a figment of the Traveller's imagination; so I wanted it to have a sort of ethereal design, a lot like the burning bush in Dreamworks' "Prince of Egypt". I didn't want this to be the most realistic tree out there; I was more interested in giving an idea of how it moved, and the kind of feeling it could evoke. I was messing around with toon outlines at this point (I'll talk more about this in the next section), and I thought of using actual brush strokes for the foliage. And so this is what ended up happening: I modeled a simple, blocky shape for the foliage's volume, attached a brush outline to the shape, and converted the brush strokes into actual polygons. Then, much like I did with the model's hair, I rigged the foliage with a combination of IK spline joints and soft-selection clusters. This gave me a large amount of control over exactly how I wanted the leaves to move.


P R E V I O U S N E X T >>

